Home Sushi Made Easy
Home Sushi Made EasyPosted by Elena Rossi on 02-06-2026
On Trend
Making sushi at home sounds like a project reserved for people who really know what they're doing.
But honestly, after the first roll, it clicks fast. The technique isn't hard — it just takes a bit of patience the first time, and a helper in the kitchen makes the whole process twice as fun.
Once you've got the rice down and your station set up, you can knock out a big batch in about 30 minutes.
What You Actually Need
The equipment list is short: a bamboo rolling mat, a sharp cutting tool, and a bowl of water to keep your fingers from sticking. Wrap the bamboo mat in plastic wrap before you start — it makes cleanup much easier and stops rice from getting wedged into the slats.
For ingredients, you'll need short-grain sushi rice (regular jasmine or long-grain won't work — you need the sticky, high-starch variety), nori sheets, rice vinegar, sugar, and salt. Fillings are entirely up to you. The most beginner-friendly options: smoked salmon, cucumber, avocado, and cream cheese. No raw fish required if that's not your thing.
The Rice: Most Important Step
Ingredients for sushi rice:
- 1½ cups short-grain sushi rice
- 1½ cups water
- 3 tablespoons rice vinegar
- 1 tablespoon sugar
- 1 teaspoon salt
Steps: Rinse the rice under cold water, swirling with your hand until the water runs clear — this removes excess starch. Add to a saucepan with water, bring to a boil, then reduce to the lowest heat, cover, and cook for 12–15 minutes. Remove from heat and let it sit covered for another 10 minutes. While it's still warm, gently fold in the vinegar, sugar, and salt. Let the rice cool to room temperature before rolling — hot rice tears the nori.
Setting Up Your Station
Before you start rolling, have everything prepped and within reach. Slice your fillings into thin strips about the length of the nori sheet. Keep a bowl of water nearby. Place the nori sheet on the plastic-wrapped mat, shiny side down, with the long edge facing you.
Wet your fingers and spread about one cup of rice evenly across the nori, leaving a one-inch border at the top. Press it firmly but gently — you want it packed but not mashed. Line your fillings along the bottom third of the rice in a thin row.
Rolling It Up
Steps:
Lift the bottom edge of the mat and fold it over the fillings, pressing firmly as you go. Use the mat to continue rolling forward, squeezing gently to keep everything tight. When you reach the bare nori border, dab it lightly with water — this acts as glue to seal the roll. Give the roll one final firm squeeze through the mat to compact the shape. Set aside and repeat before cutting anything — cutting works best when rolls have rested a few minutes.
To slice: Use a sharp cutting tool wiped with a damp cloth between each cut. This stops the rice from tearing. Aim for 8 pieces per roll by cutting in half, then each half in quarters.
Filling Ideas and Variations
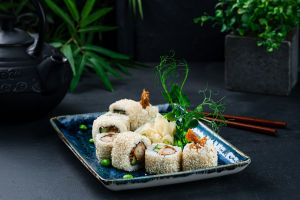
For a beginner-friendly start, a smoked salmon, cream cheese, and cucumber roll is hard to beat — the flavors are familiar and it doesn't require raw fish. For something more classic, cucumber only (kappa maki) is crisp and refreshing. Avocado and any protein of your choice is almost always a crowd-pleaser.
If you want a California-style roll, put the rice on the outside: after spreading rice on the nori, lay a piece of plastic wrap over the rice, flip the whole sheet over so the nori faces up, then add fillings and roll. The rice ends up on the outside. Sprinkle sesame seeds on the mat before placing the roll on it — they'll stick to the outside as you roll.
Serving and Notes
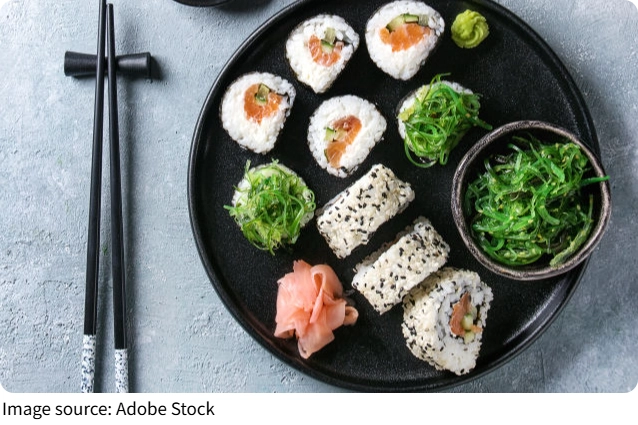
Serve immediately with soy sauce, pickled ginger, and wasabi. A drizzle of spicy mayo on top takes the whole thing up a notch. Sushi doesn't store well — the rice gets dry and hard in the fridge — so plan to eat it fresh. If you're hosting, set up a sushi bar where everyone builds their own rolls and you won't have to race to finish them before they sit too long.

Once you've made sushi at home a few times, you'll find it's easier, more affordable, and more customizable than ordering it from a restaurant.
Popular
Most Nutritious Foods
A nutritionist's honest ranking of the most nutrient-packed foods most of us already have at home.
Smart Fridge Stocking List
Keep a few reliable staples on hand and stay just 15 minutes away from a satisfying meal with minimal planning.
Home Sushi Made Easy
Make restaurant-style rolls at home with simple tools, sticky rice, and fillings you actually love.
Seasonal Fruit Benefits
Fruits picked at peak ripeness are richer in nutrients, better in flavor, and cheaper than out-of-season alternatives